AERI Filter Replacement Procedure
Tools and Equipment Required
- Large phillips screwdriver
- Replacement filters
Procedure
Outside Air Filter (typically changed monthly)
- Remove the front panel from the AERI front-end
- Unplug the outside air fan power connector: OUT FAN (white square 4-pin)
- Unlatch the outside air fan enclosure
- Remove the filter housing. Remove and discard the old filter material inside
- Insert the new filter material into the housing
- Blue 2″ thick filter goes on top; White 1″ thick filter goes on the bottom (as viewed once installed)
- Install the filters with the firmer face up (as viewed once installed)
- Replace the filter housing, on top of the mesh grid
- Relatch the fan enclosure
- Reconnect the outside air fan power connector: OUT FAN (white square 4-pin)
- Replace the front panel onto the AERI front-end
Inside Air Filter (typically changed yearly)
- Remove the front panel from the AERI front-end
- Unlatch the inside air fan enclosure
- Remove the old filter and discard
- Install a new filter
- Make sure the arrow on the filter points up, in the direction of the airflow
- Relatch the fan enclosure
- Replace the front panel onto the AERI front-end
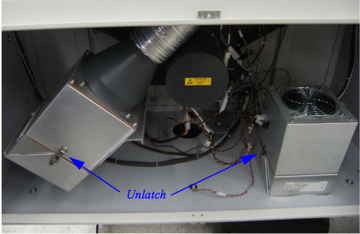
Figure 1. Location of the inside air filter (left) and outside air filter (right) within the front-end
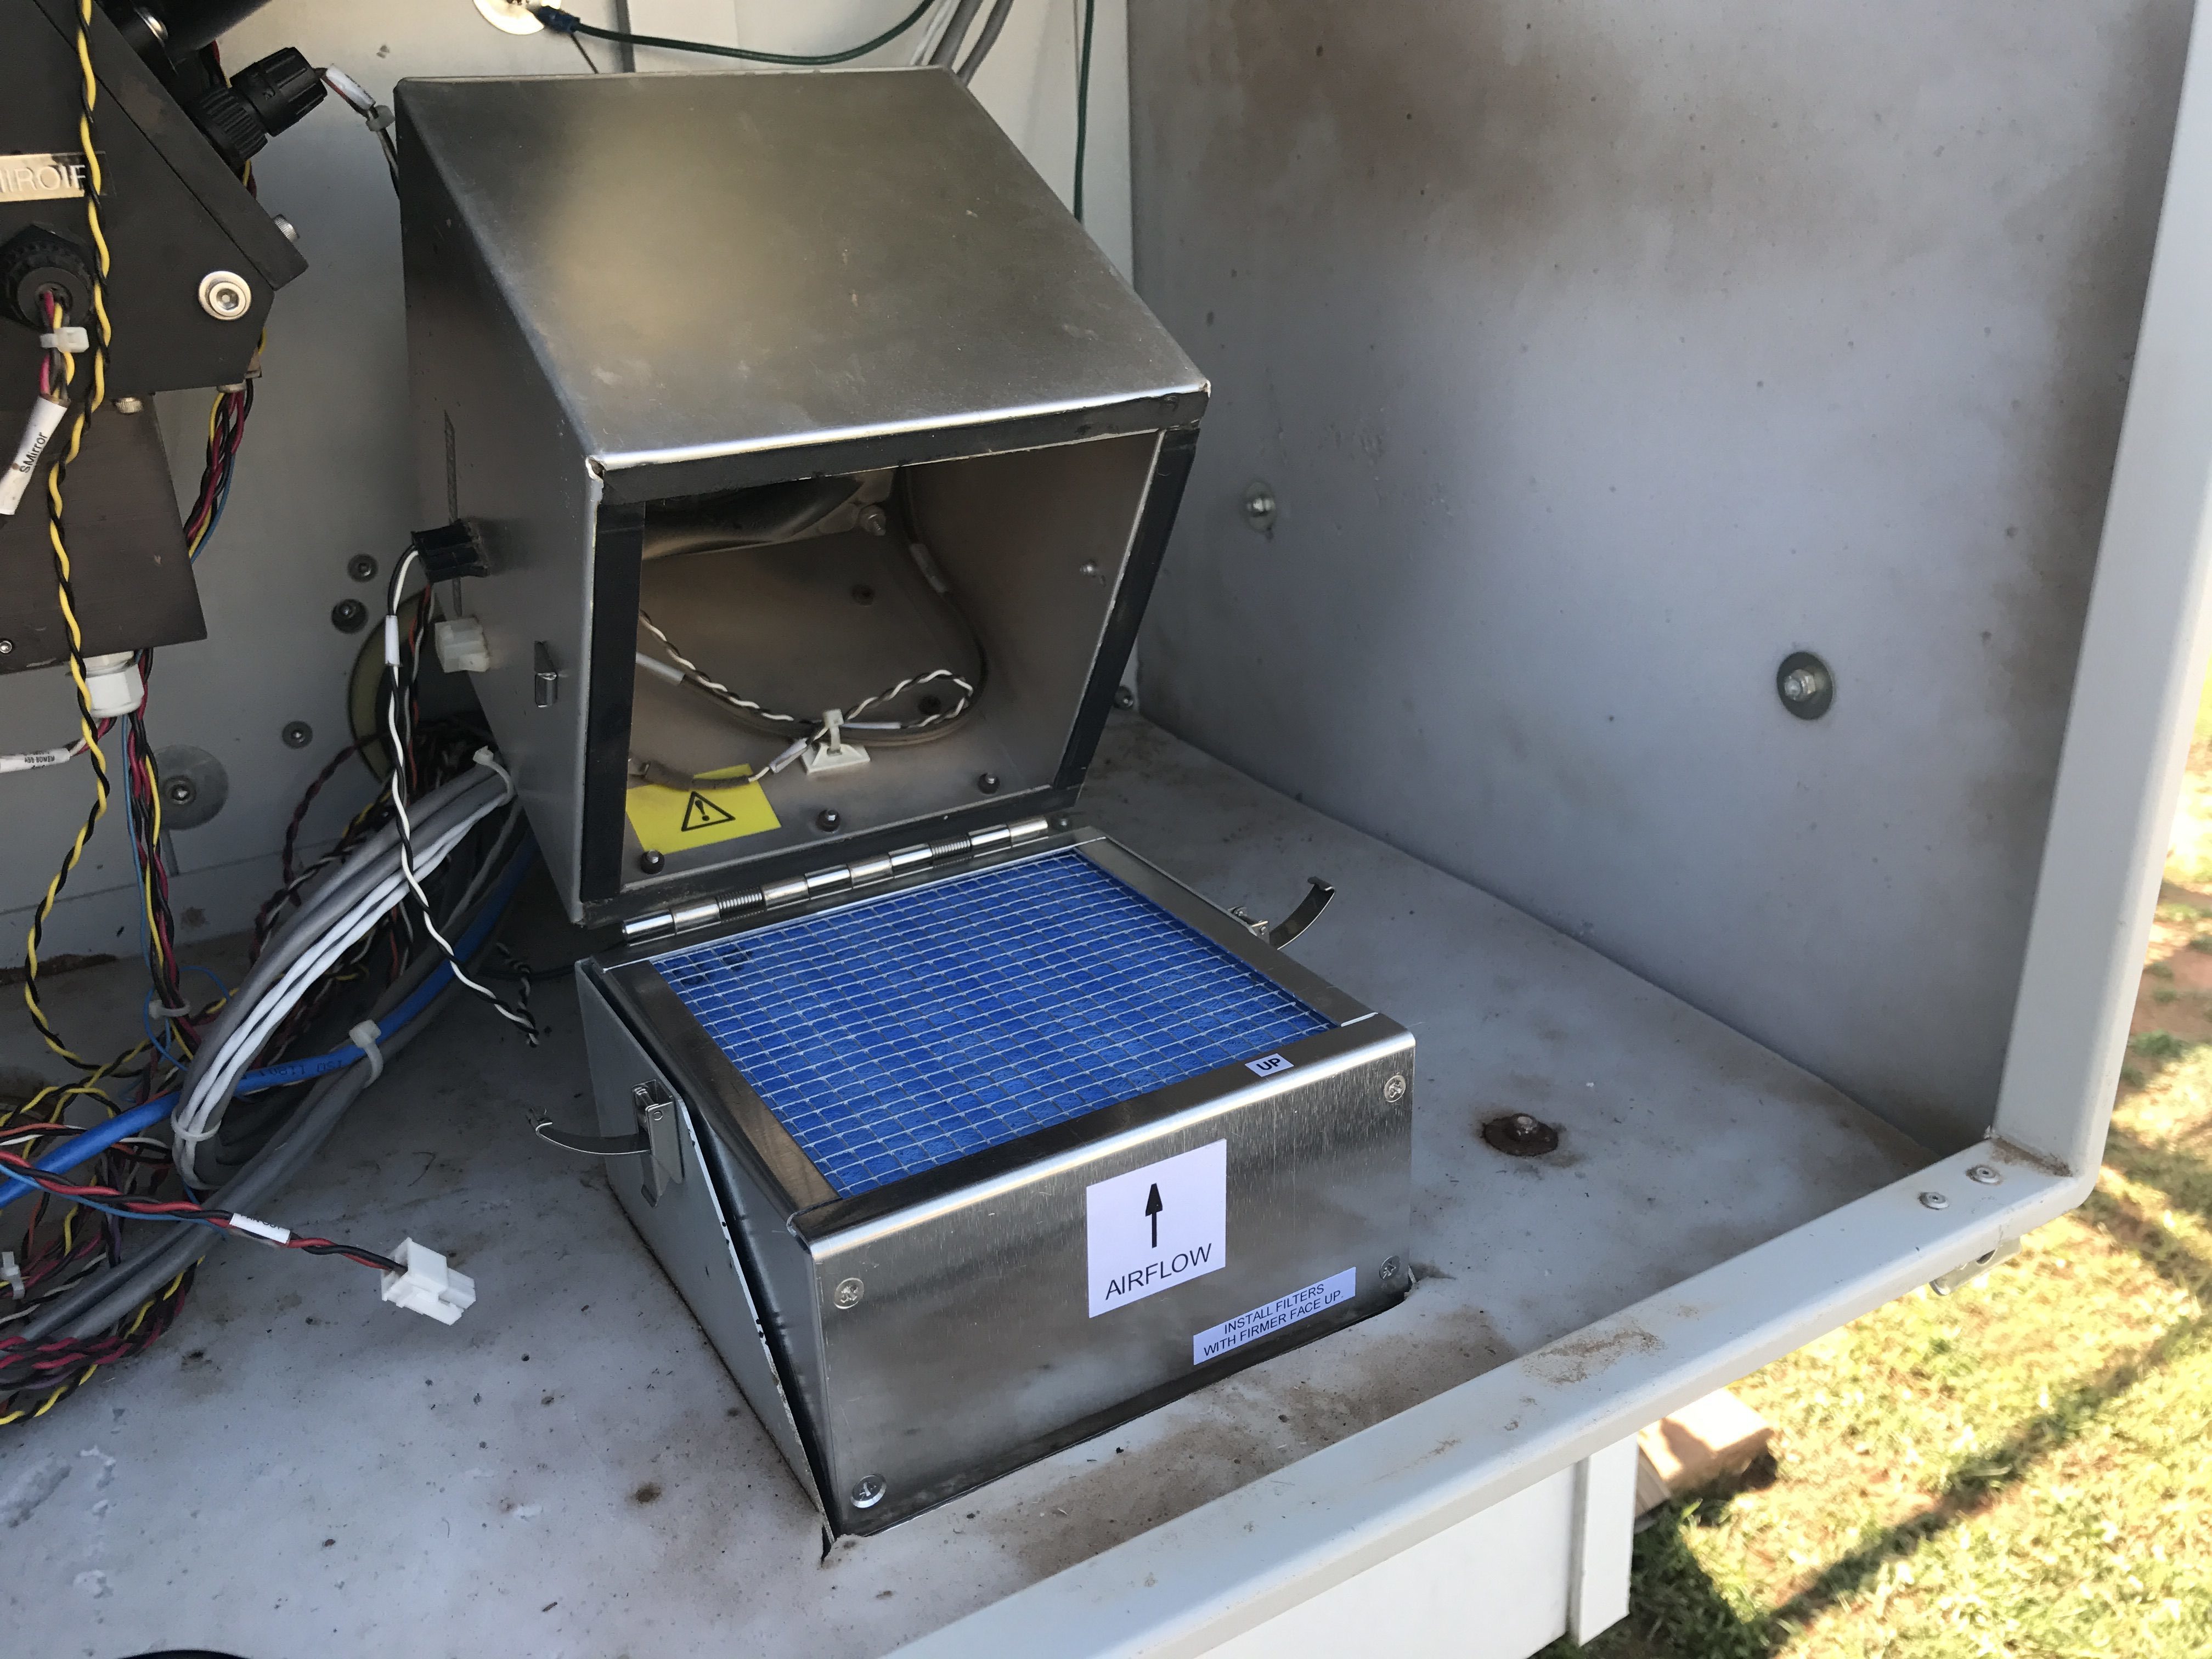
Figure 2. Outside air filter installed
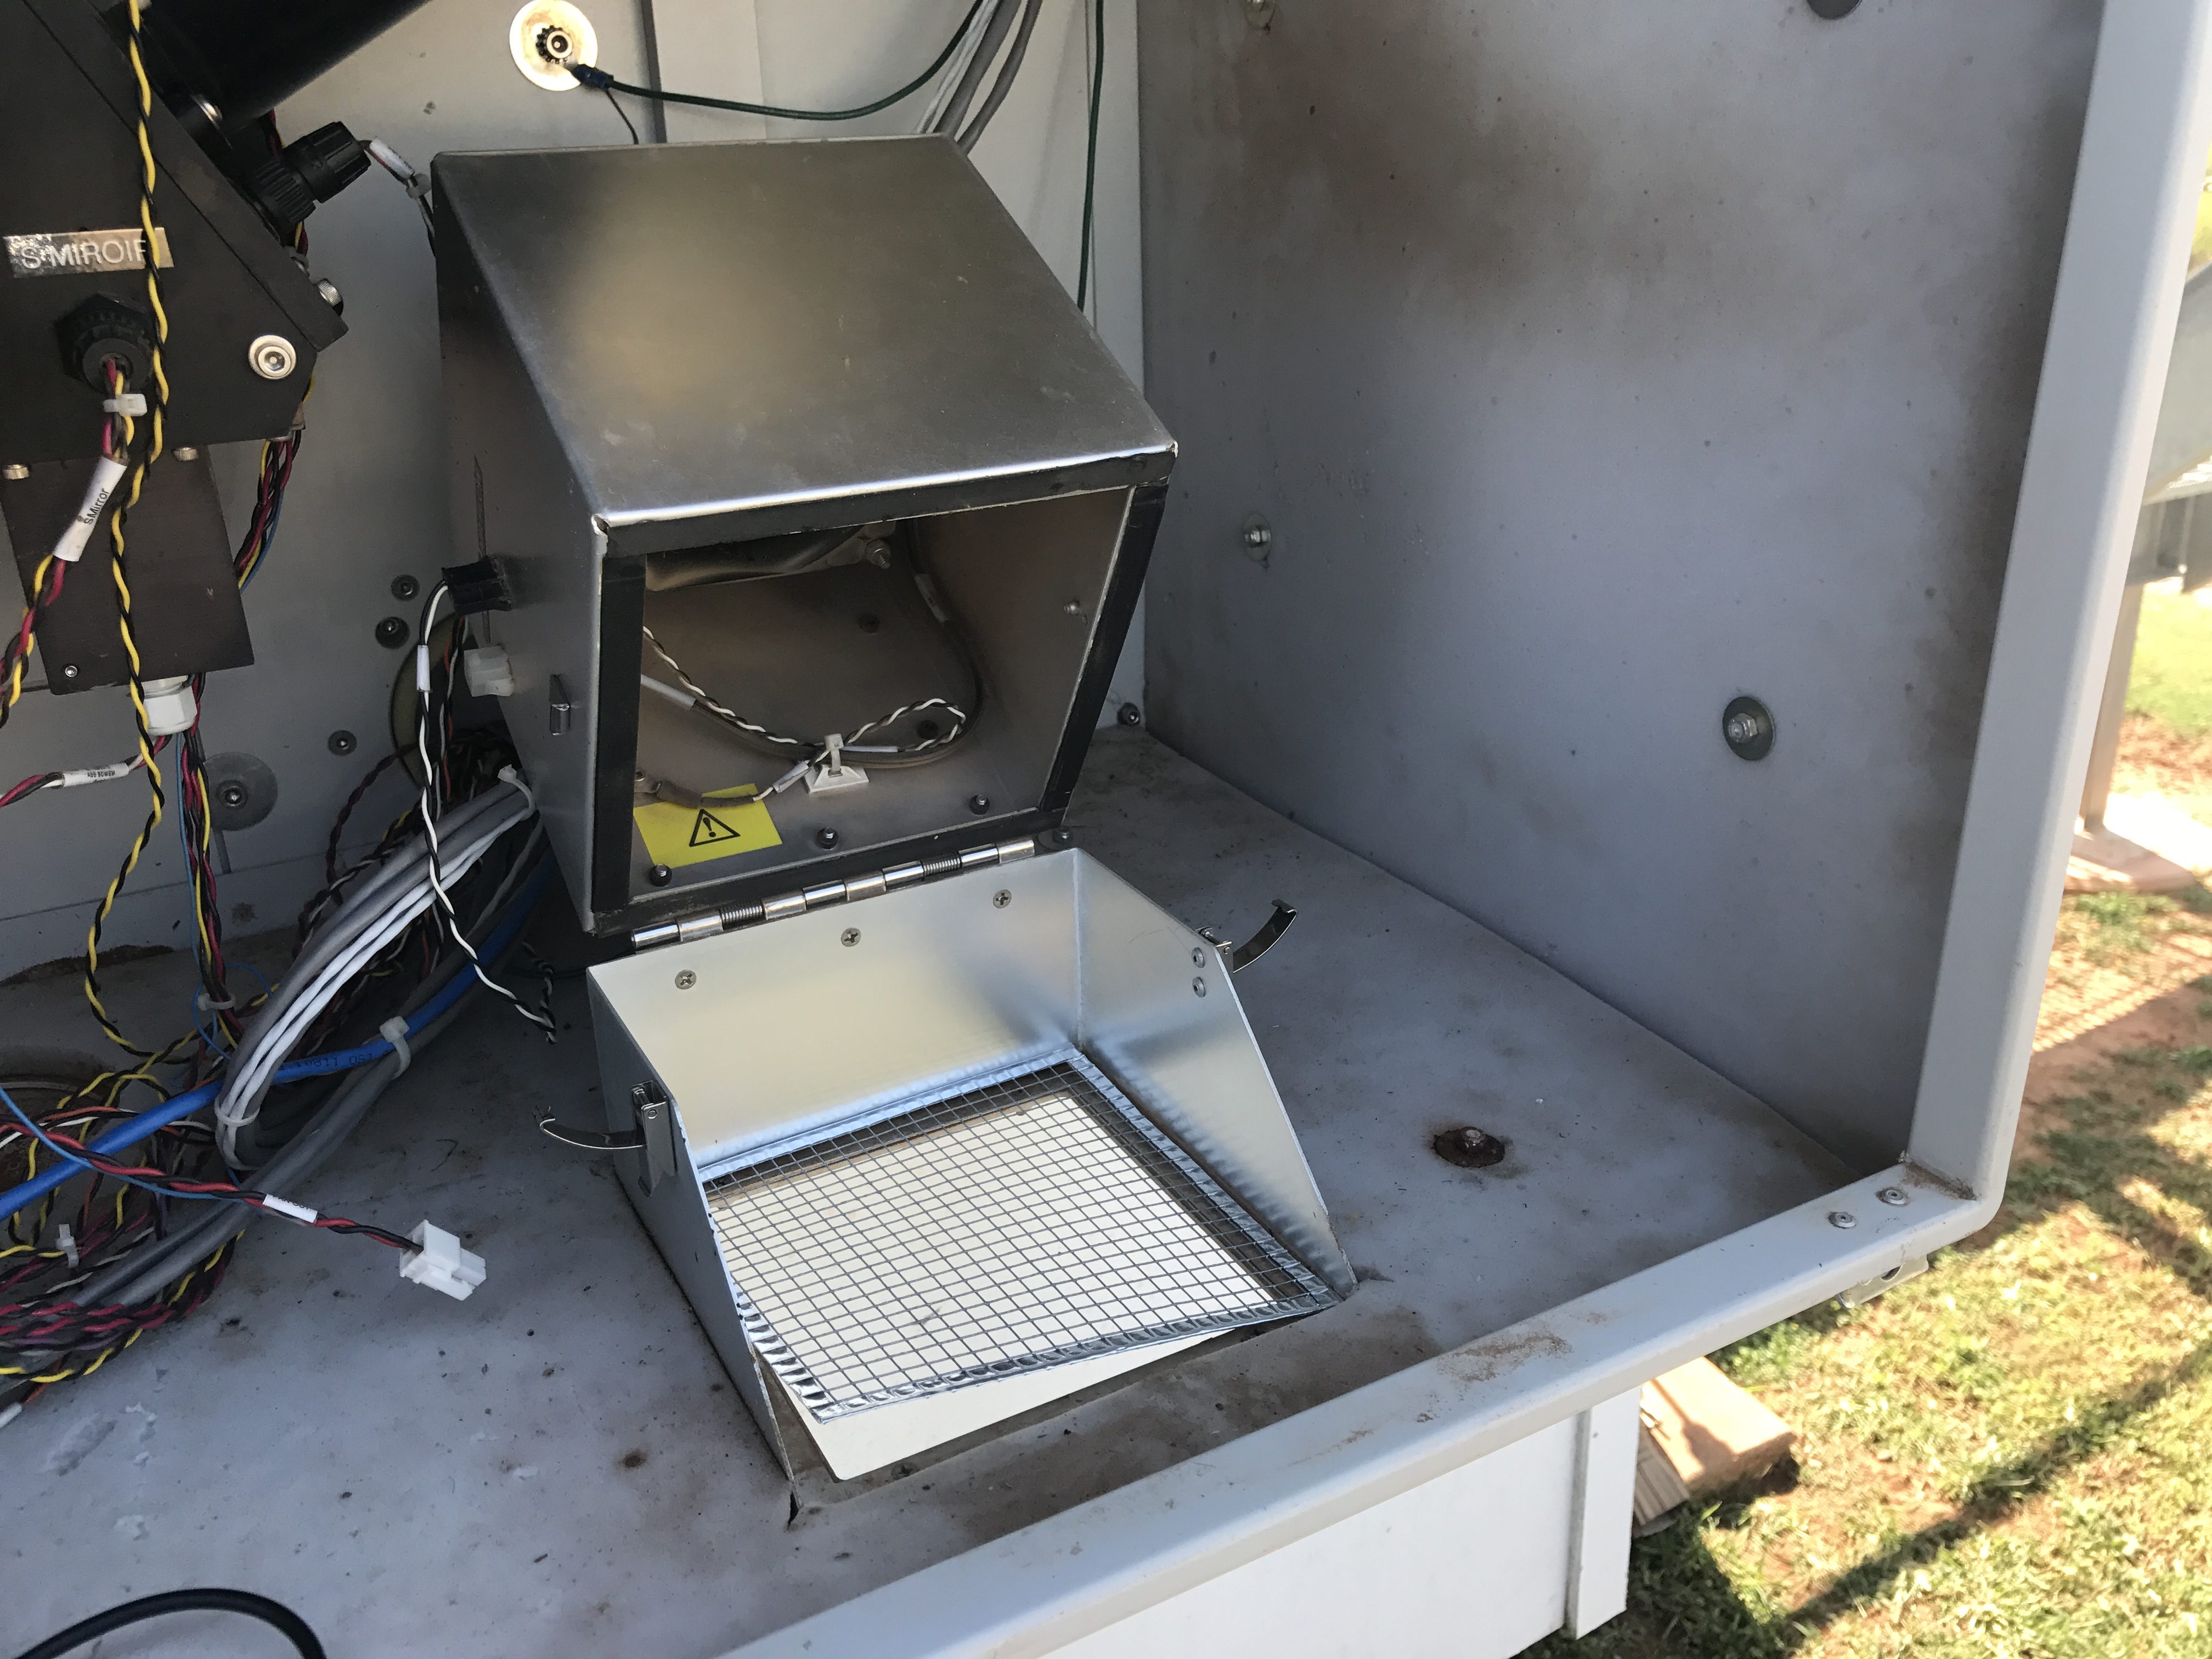
Figure 3. Outside air filter removed
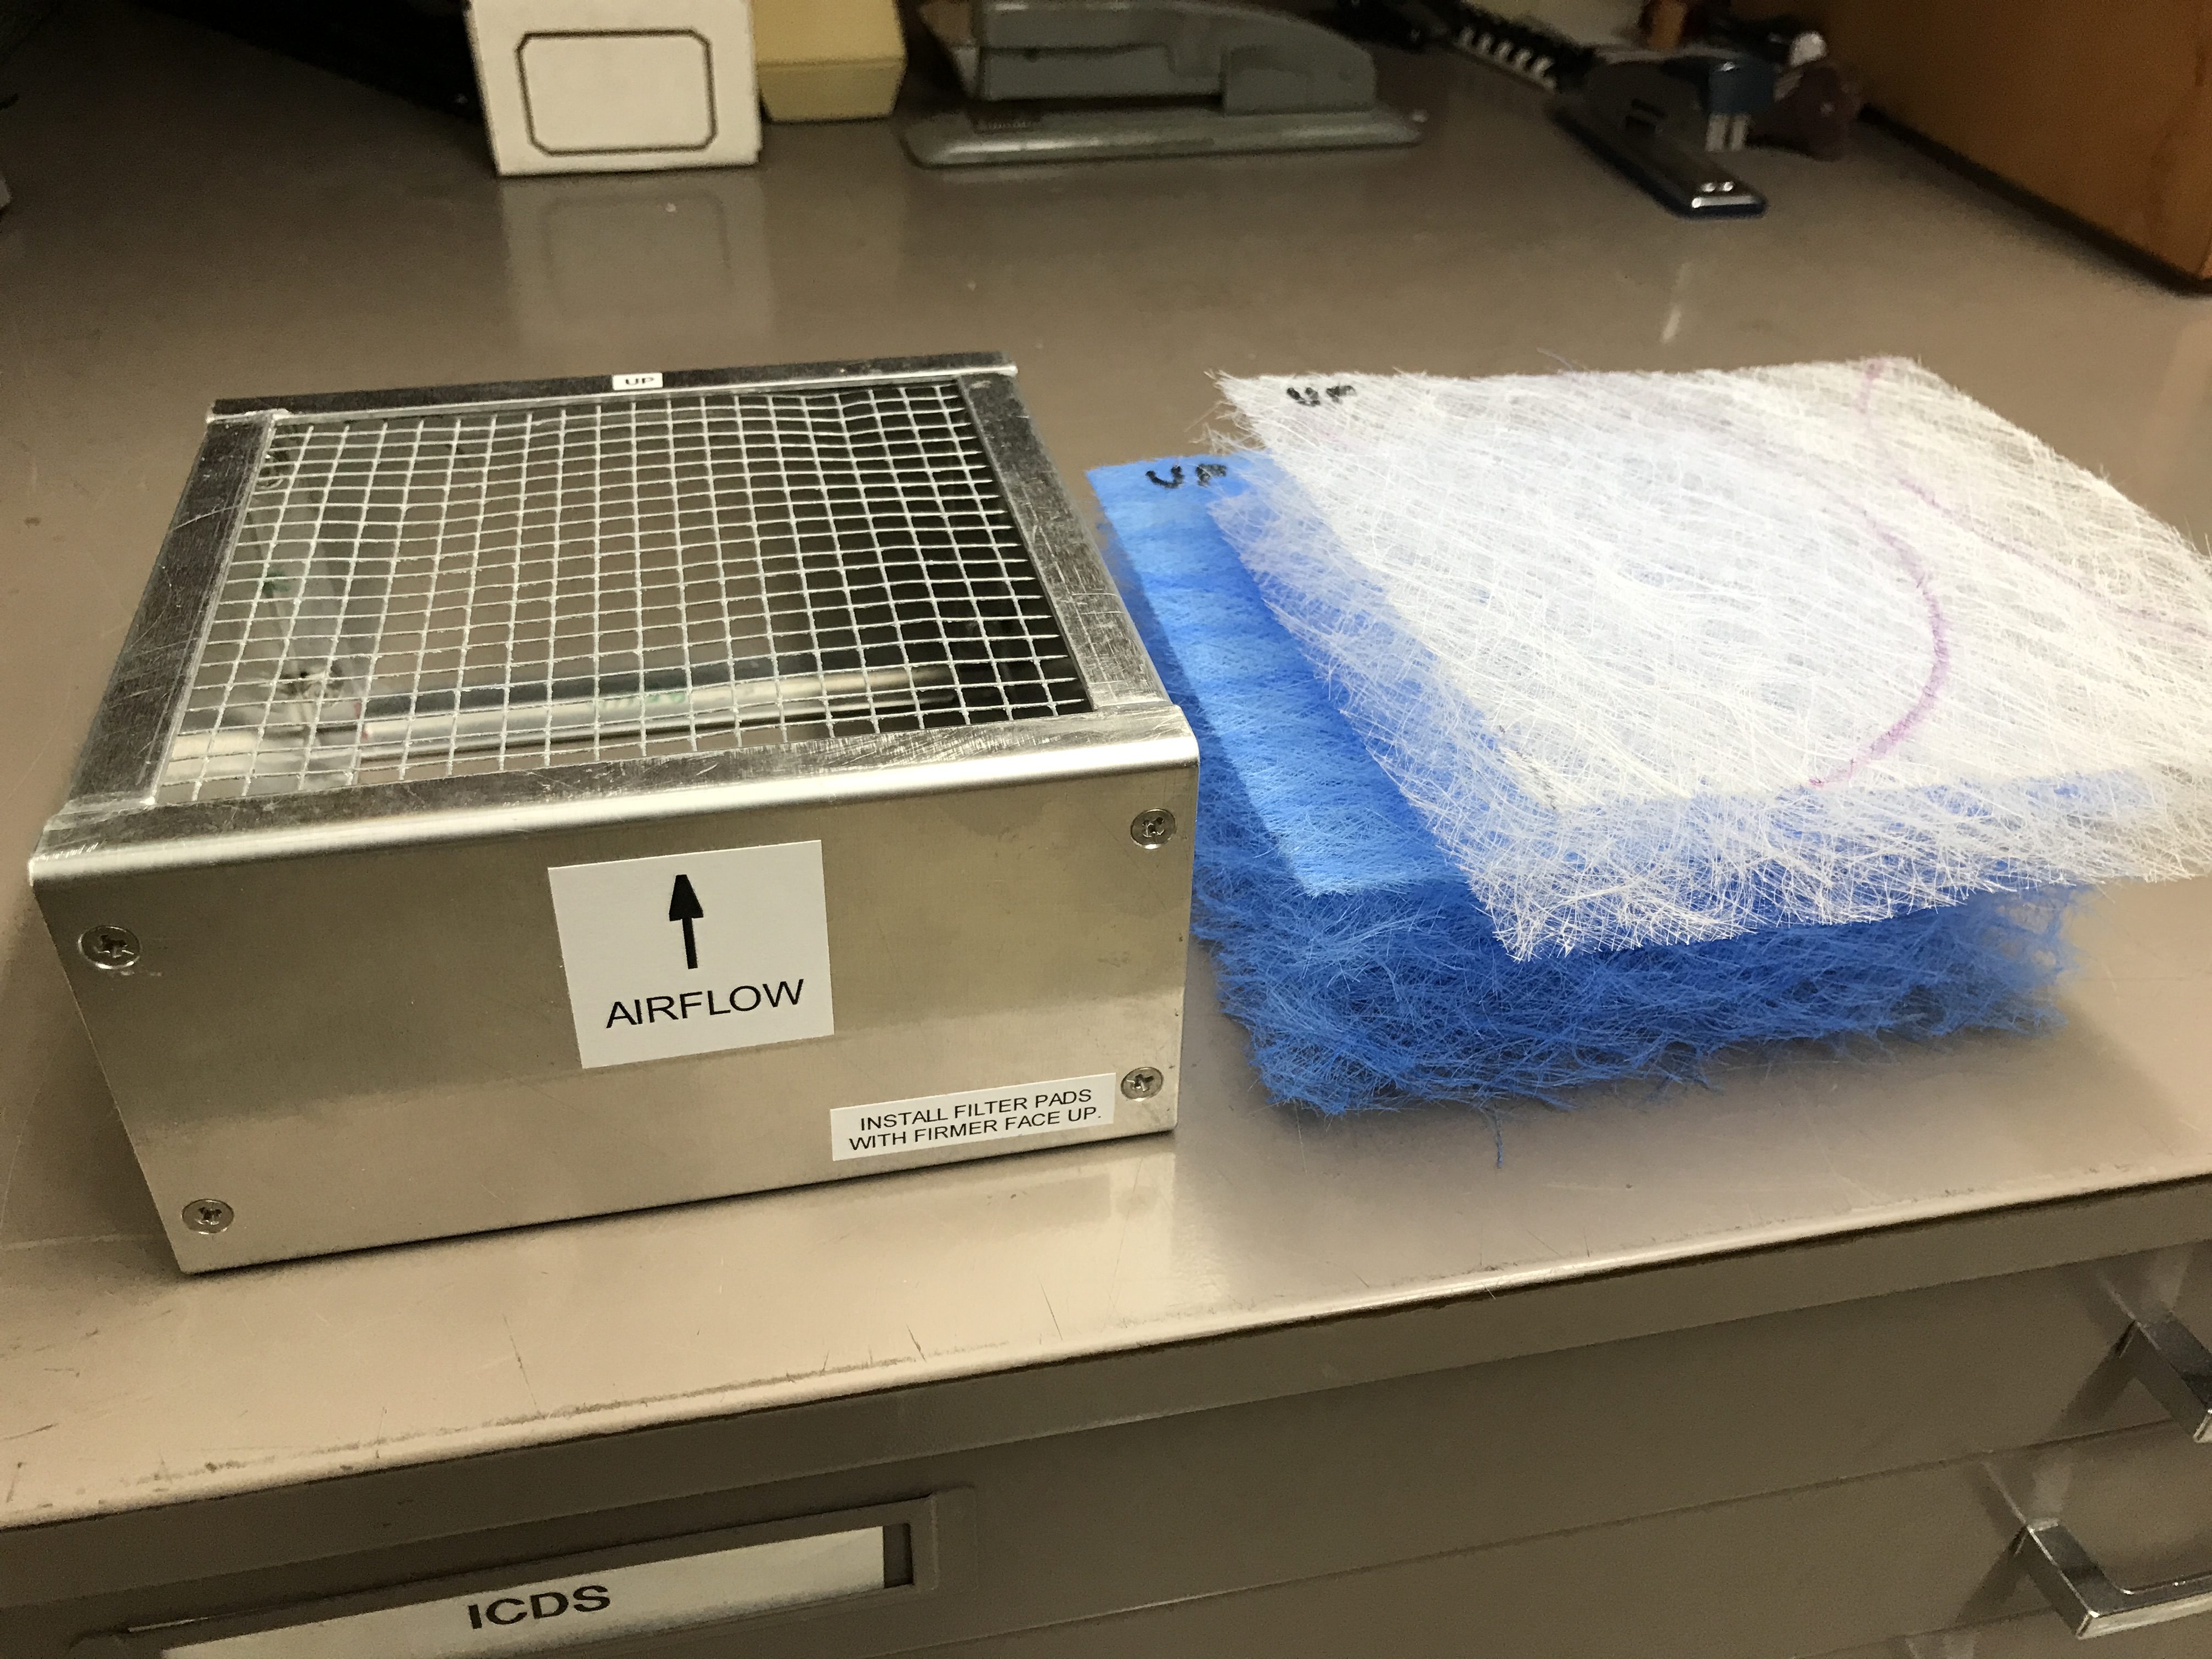
Figure 4. Replacement outside air filter
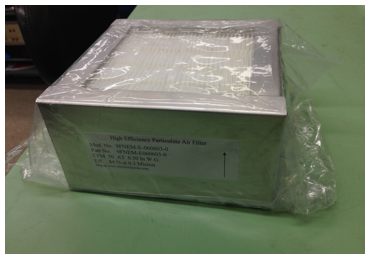
Figure 5. Replacement inside air filter