Laser Detector Filter Removal
Tools and Equipment Required
- Hex ball driver set
- Small ziplok bag for storing removed filter
- (Optional) Tweezers with non-metal (non-scratching) tips
- (Optional) Gloves for handling optics
Precaution
- Keep the inside of the interferometer as clean as possible
- Avoid touching any optical components (other than the filter to be removed)
- Be careful not to drop the filter inside the interferometer compartment
Procedure
- Note the laser intensity prior to performing this procedure.
- Stop Ingest and power OFF the AERI at the power bar
- Temporarily remove the motor controller to have better access to the reference port (see Fig. 1)
- Remove all connectors going to the motor controller
- Loosen the two bottom screws holding the motor controller
- Remove the top screw holding the motor controller
- Remove the motor controller and place is down beside the side-brace of the back-end. Note that a thermistor will still be attached – usually there’s no need the remove it since the cable is long enough, but it can be temporarily removed if necessary
- Remove the black rectangular panel that holds the interferometer reference port (right side of interferometer), taking care not to touch the inside of the panel (see Fig. 1, 2)
- Only partially undo the bottom two screws (3-4 turns)
- Completely remove the top two screws, taking care not to lose the lockwashers
- Gently remove the rectangular panel
- Disconnect the connector on the wire attached to the panel
- Store the panel temporarily in a clean location
- Remove the laser detector filter (see Fig. 3). It is a small puck-shaped piece of glass, attached to the laser detector (black rectangle with gummy ball on back, on a post) using an adhesive. Take care not to scratch the filter surface, or apply too much force on the laser detector.
- Try to remove the filter using non-metal tipped tweezers (so they don’t scratch the filter)
- Alternatively use gloved fingers to gently remove the filter
- Take care not to drop the filter inside the interferometer compartment
- Replace the rectangular reference port panel
- Re-attach the connector to the wire attached to the panel
- Gently insert the panel in place, starting with the bottom edge, carefully placing the black reference port ‘puck’ inside
- Ensure that the rectangular panel is completely well seated and flush with the interferometer housing
- Tighten all four screws
- Turn ON the AERI at the power bar
- Note the laser intensity after performing the procedure
- If the laser intensity is acceptable, resume Ingest

Figure 1. AERI back-end showing reference port and motor controller
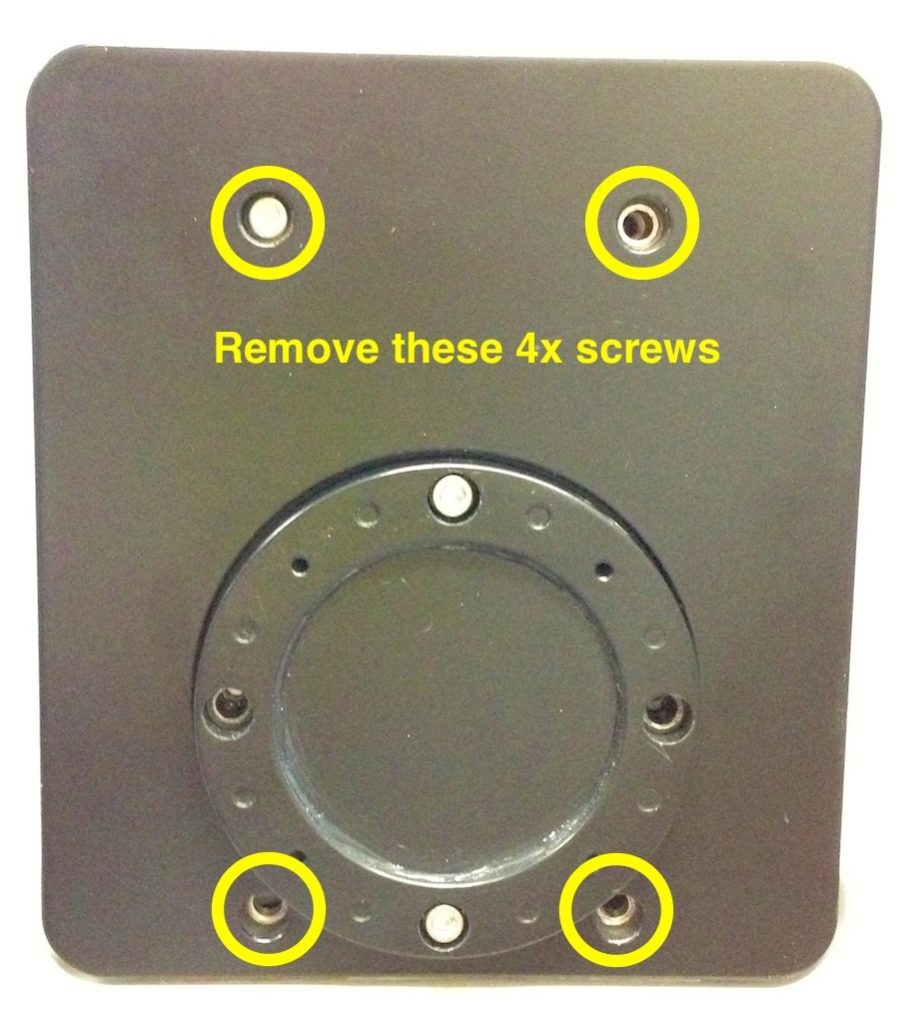
Figure 2. AERI reference port
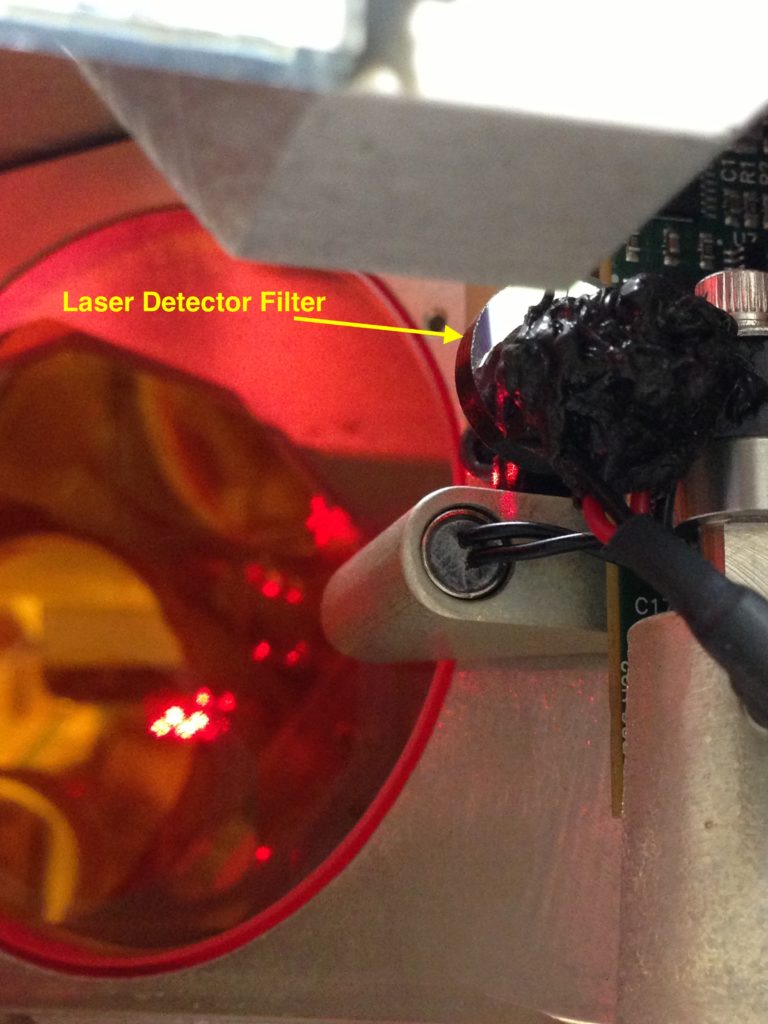
Figure 3. View inside reference port showing the laser detector and filter