


VISITview tutorial
June, 2002
Introduction
This tutorial is designed to walk you through the development and
deployment of a VISITview-based lesson. Before you can do this, you
must:
- Download and install the VISITview program -- see the links at the
bottom of the VISITview home page.
If you are installing on a Windows machine, please use the
"Windows installer". If you are installing on a different platform,
you must:
- Get a copy of the Java Runtime Environment (JRE) appropriate for
your system
- Get the visitpack.zip file from the link above and
unpack it into a new directory
- Edit the various .bat files to include the correct PATH
to your JRE, and change \ into /.
- Download and unpack the example images from
here. This is a self-extracting ZIP
file (and if you are doing this on a non-Windows machine, you may just
'unzip' it). It is best to put these into their own (new) directory.
- Start up the Lesson Builder and walk through each step outlined in
the next several pages, right along with this tutorial.
Table of Contents
Getting your images into the lesson
Making animations
Changing your mind
Making portals
Using overlays
Saving your lesson
Creating a Quiz
Recording annotations and audio
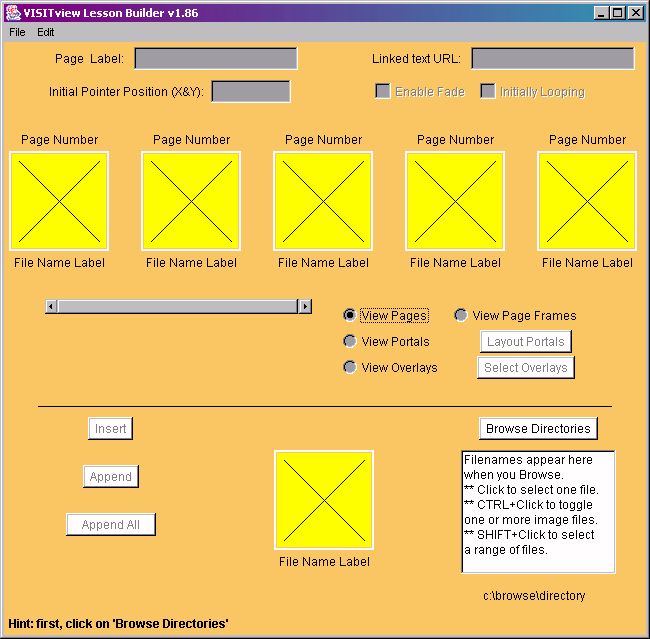
The Lesson Builder window
To start the Lesson Builder, either click on the Lesson Builder icon,
or run the build.bat file. The Lesson Builder main window
will pop up. It looks like this:
Below, however, is a seemingly complex diagram that also includes a
label to define each of the parts of the Lesson Builder window:
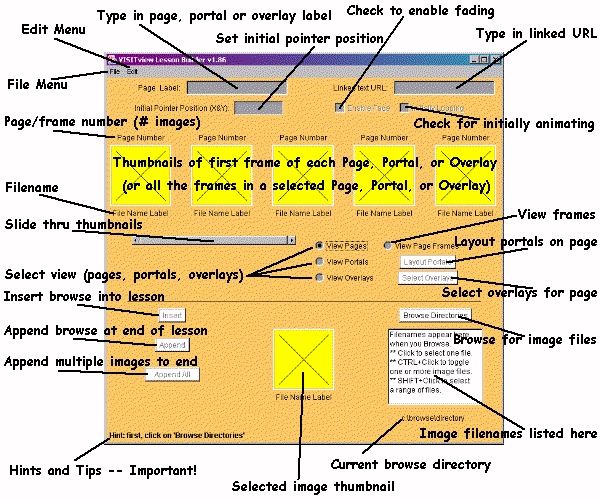
Please take a few moments to study this, and compare it to what you
see on your own screen.
When you're ready to start building a lesson, please
click here.
To return to the VISITview Home Page, please
click here.