


VISITview tutorial
June, 2002
Making portals
This page will show you how to use portals -- picture-in-picture if
you will -- in your presentations. These are useful for showing
multiple sensors or other geolocated information.
There are two kinds of portals:
- Georeferenced portals that are in exactly the same scale and
projection as the 'background' image. An example of this might be
using an IR image in the background, but having a portal of the
visible image. Another example would be a 4-panel (4 portal, that is)
display. In these cases, the instructor can cause the portal location
in the image to be changed so that all views (background and all
portals) have the Big Red Pointer aimed at the same geolocation.
- Non-georeferenced portals. In this case, the portal is
exactly the same size as the portal image (so it is not
'roamable'). The software senses this state and prevents the users
from trying to roam the portal images.
Here are the Ground Rules for portals:
- There must be the same number of frames in a portal as there are
in the page that portal is applied to. If your page has 4 frames,
your portal(s) must also have 4 frames.
- Georeferenced portals must have the same size and
projection as the images in the page if they are to remain geolocated
as the Big Red Pointer is moved across the page image.
- Portals may not overlap each other.
- A portal may cover the 'background' page image(s) completely.
There are special considerations for this mode of operation, however.
You should contact

if you want to do this.
Let's get started!
- Putting portal images into your lesson follows steps very similar
to putting images into pages. Let's define our first portal.
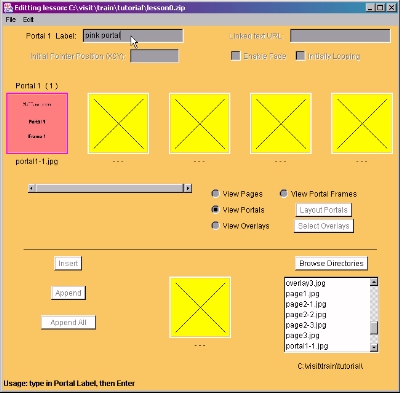
- Click the View Portals button - your screen should look
like:

- Click the Browse Directories
- Choose the file portal1-1.jpg
- After the thumbnail appears, clickAppend to add it to
your lesson
- In the text box at the top, type in a label, as shown:
- Now, click on View Portal Frames
- Select the image files portal1-2.jpg and
portal1-3.jpg
- Click on Append All 2
- Your display should now look like this:
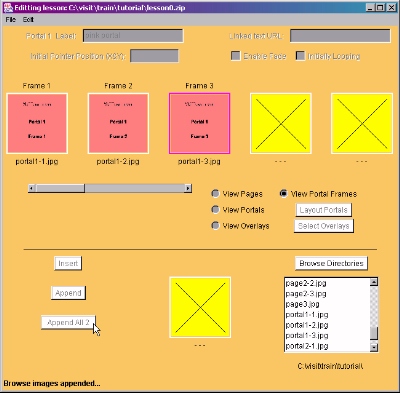
- Congratulations! You've now defined a portal!
- Next we want to use this portal in Page 2 of our lesson, so
click on the View Pages button
- Now, select Page 2 by clicking on the thumbnail for
Page 2 (if it is already selected, you will get a pop-up window of
the complete image -- just click on it to dismiss it). Your
screen should show:

- Now, let's layout the portal on this page.
- Click on the big white button labelled Layout Portals
- A new window will pop up that shows the first image of Page 2
(the selected page)
- Find the list of portals, and click on the first (and
only) one. A small patch of your portal's first frame will appear
in the upper left corner, as seen in this screenshot:

- Note the help message:
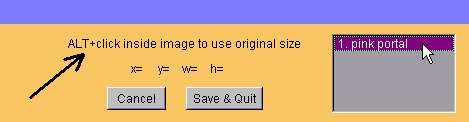
If you hold the alt button and click on the patch image, you
will set the system to work with a fixed-sized (no-roamable) portal.
In order to use this mode, however, the portal image must be smaller
than the 'background' (page) image -- which it is not in this case.
- Now... move your mouse pointer over this patch. You will notice
that there are two cursor forms that show:
- Near the corners, the 'resize' cursor is shown -- meaning if you
drag the mouse (hold left button down and move) you will resize the
portal.
- Near the middle, the 'move' cursor is shown -- meaning if you
drag the mouse, the entire patch will move.
- Please play with moving and resizing the portal
around...like:

- (Note there are useful hints and tips shown...)
- Although the portal is shown as a complete and scaled image, in
the lesson it is not shown that way -- it is never scaled.
- Note that the location (x,y) of the upper left corner and the
(width,height) information are given as you move the portal around.
- When you're happy, click the Save & Quit button.
Back in the main window, you should see:

Notice the little "p" in the Page 2 (3)p. This means that
you've defined a portal for this page.
Now, practice this by defining a second portal using the image
files portal2-1.jpg through portal2-2.jpg.
Add this portal to Page 2 as well to practice using more than one
portal.
When you're ready to learn about using overlays, please
click here.
To return to the VISITview Home Page, please
click here.