M-AERI 3rd Blackbody Calibration – MOSAiC
Equipment Required
- Large flat screwdriver
- Small phillips screwdriver
- Ball driver set
- 3rd Blackbody
- 3rd Blackbody breakout cable
Precaution
- Verify that the red aperture cover of the 3rd blackbody has been removed prior to installation
- Ensure that the instrument does not lose power during test: loss of power automatically closes the top hatch, and can damage the hatch & blackbody
- Ensure that the ABB SP cable is disconnected after the test is complete
Procedure
Hardware setup
- Stop Ingest
- Using the manual switch inside the back-end, set top hatch OPEN (bottom position)
- Remove the front-end panel
- Remove the sky view aperture (four hex screws) (Fig. 1)
- Remove the red protective aperture cover from the 3rd blackbody (Fig. 2)
- Install the 3rd blackbody in the sky view position through the top hatch with ~2 hex screws (Fig. 3)
- Connect the 3rd blackbody breakout cable (Fig. 3)
- Disconnect the ABB connector from the ABB
- Connect the ABB connector into “ABB Connector” on the breakout cable
- Connect the “ABB” connector on the breakout cable to the ABB
- Connect the “3rd body” connector to the 3rd blackbody
- Note, it’s best if this cable runs inside the front-end, so that the front panel can be replaces to protect the front-end
- Connect the ABB SP cable to the ABB blackbody controller board connector on the AERI back-end (Fig. 4)
Software setup
- Manage the data directories
- Rename c:\AEYYMMDD
- cd /cygdrive/c
- mv AEYYMMDD AEYYMMDDA
- Rename c:\ftp\AEYYMMDD
- cd /cygdrive/c/ftp
- mv AEYYMMDD AEYYMMDDA
- Delete (or rename) c:\temp
- cd /cygdrive/c/temp
- rm *
- (or mv temp tempA to continue afterward where ingest left off)
- Delete c:\E-AERI\Data\HouseKeeping.hk
- cd /cygdrive/c/E-AERI/Data
- rm HouseKeeping.hk
- Rename c:\AEYYMMDD
- Change to 3rd body breakout configuration
- cd \\config
- change_config_to 3body_breakout
- cat mirror.beg (to verify new correct mirror program is selected)
- Change FTSW configuration file
- open the file c:\E-AERI\FTSW_EAERI.Config
- Set calibKitY.connected = true
- save the file
- Run FTSW_EAERI_GUI.bat
- The software detects modification of the configuration file (see Fig. 5). Click OK to start FTSW in calibration mode
- Select the blackbody coefficient file for the 3rd blackbody (c:\3rd body coeffs, AMF-2 uses S/N 52)
- Verify that ref1 Blackbody is displayed in FTSW and heating and stabilized at the correct temperature (Fig. 6)
- The default setting is 45°C, and the blackbody heats at a rate of ~1°C/min
- Exit FTSW
Running the test
- Run Ingest.bat to start the 3rd blackbody test
- Run for at least 1.5 hours
- To terminate the test, press ctrl-c up to 3 times in the black Cygwin window, and close the FTSW window
Software packup
- Manage the data directories
- Rename c:\AEYYMMDD
- cd /cygdrive/c
- mv AEYYMMDD AEYYMMDD_3body
- Rename c:\ftp\AEYYMMDD
- cd /cygdrive/c/ftp
- mv AEYYMMDD AEYYMMDD_3body
- Delete (or rename) c:\temp
- cd /cygdrive/c/temp
- rm *
- (or mv tempA temp to continue afterward where ingest left off)
- Delete c:\E-AERI\Data\HouseKeeping.hk
- cd /cygdrive/c/E-AERI/Data
- rm HouseKeeping.hk
- Rename c:\AEYYMMDD
- Change to normal science configuration
- cd \\config
- change_config_to ice1 if on the ice, or sea11 if on the water, whichever scan sequence was used before
- cat mirror.beg (to verify new correct mirror program is selected)
- Change FTSW configuration file
- open the file c:\E-AERI\FTSW_EAERI.Config
- Set calibKitY.connected = false
- save the file
- Send the directory c:\ftp\AEYYMMDD_3body to the mentor for analysis
- If bandwidth is limited, only the the files YYMMDDC1.RNC and YYMMDDC2.RNC are needed
Hardware packup
- Disconnect the ABB SP cable from the ABB blackbody controller board connector on the AERI back-end (Fig. 4)
- Disconnect the 3rd blackbody breakout cable
- Reconnect the ABB connector to the ABB
- Uninstall the 3rd blackbody
- Replace the red protective aperture cover
- Re-install the sky view aperture
- Attach the aperture with the four hex screws
- Re-install the front-end panel
- Set the manual switch for the top hatch to AUTO (top position)
- Restart normal Ingest
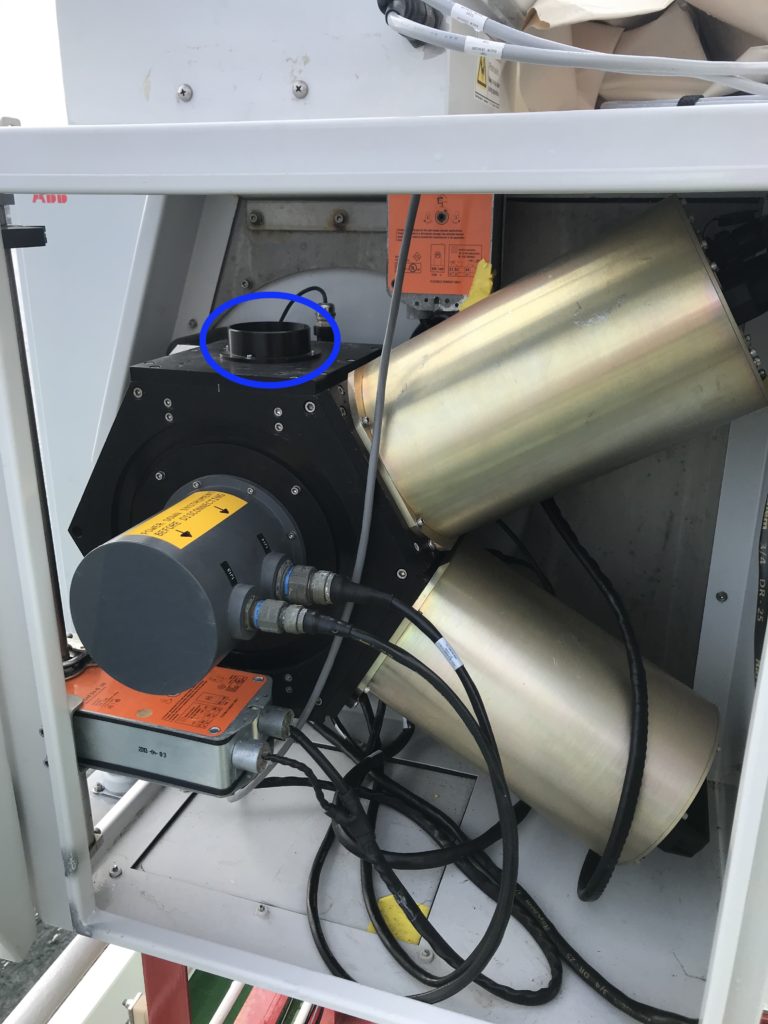
Figure 1. Sky view aperture to be removed
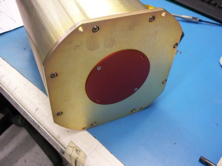
Figure 2. 3rd blackbody with red aperture cover
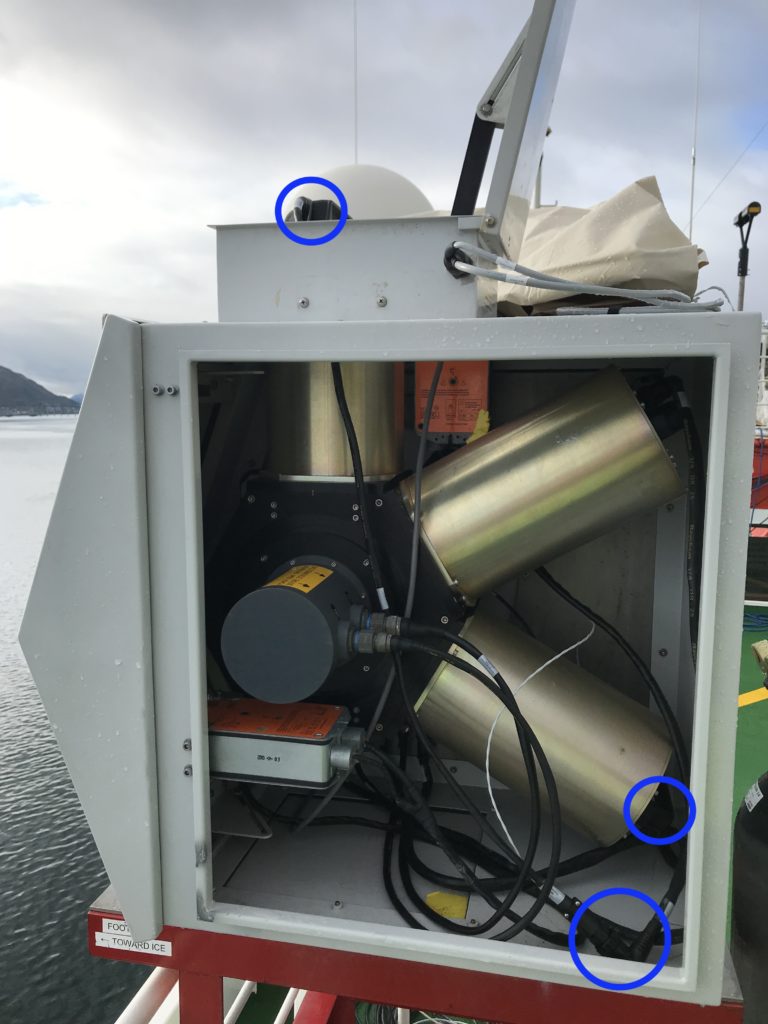
Figure 3. M-AERI front-end in 3rd blackbody configuration: the 3 connections for the 3rd blackbody breakout y-cable are shown
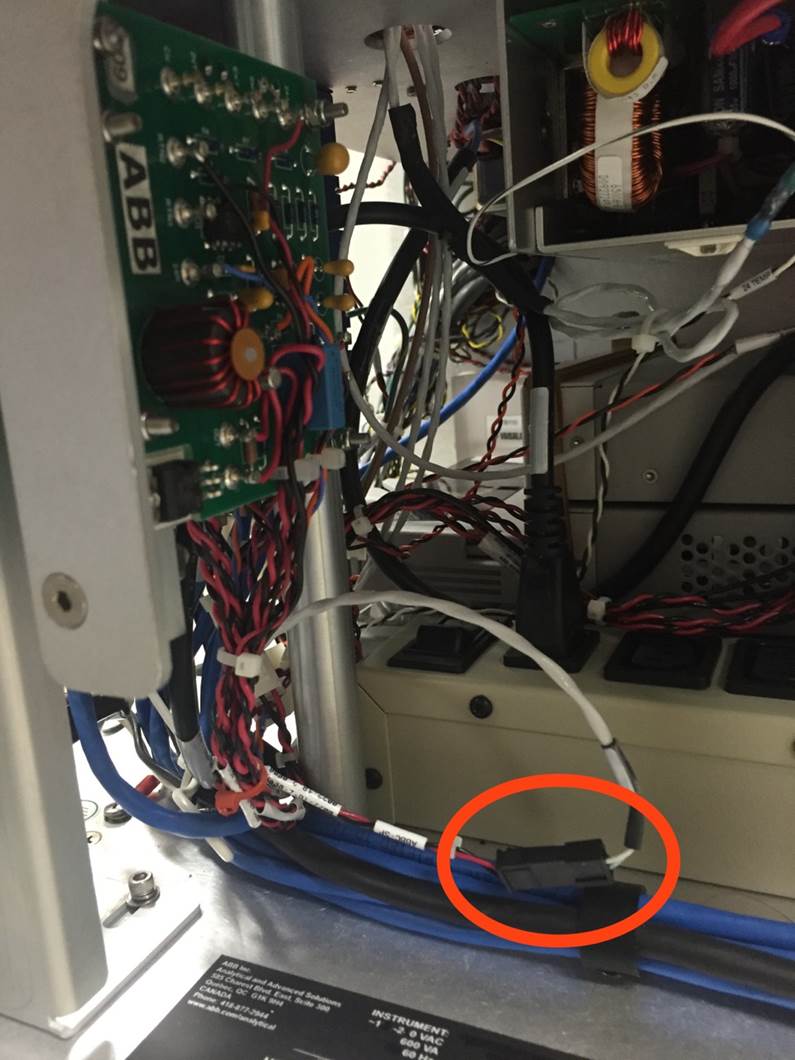
Figure 4. ABBC SP connector on the AERI back-end
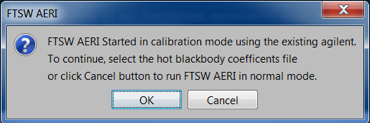
Figure 5. FTSW startup detects a configuration change
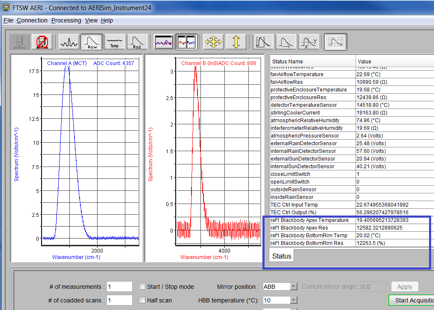
Figure 6. FTSW housekeeping panel showing 3rd blackbody temperature readings (ref1)