AERI Desiccant Replacement Procedure
Tools and Equipment Required
- Large flat head screwdriver
- Desiccant: approx. 5oz/150 mL silica gel beads, molecular sieve, or calcium sulfate (Drierite). Molecular sieve is recommended. Alternatively the entire desiccator module (SPL6300G) can be replaced.
- Recommended: Dry nitrogen gas, with 0-15 psi regulator, interferometer purge fitting, 0-10 scfh flow meter, and several feet of ¼” I.D. Tygon tubing.
Precaution
- The interferometer in the extended range (ER) AERIs at the NSA and AMF-3 sites contains hygroscopic optics that will degrade upon exposure to humid air. Use a dry nitrogen purge, if possible, to purge the interferometer case when performing a desiccant change. Continue purging the case for several minutes after the desiccant assembly has been installed.
- If purge gas is not available, minimize the time that the interferometer case is open to humid outside air by performing certain steps of the desiccant replacement procedure quickly.
- Minimize the time that the replacement desiccant supply is open to outside air.
Procedure
- Leave the spectrometer powered on during the desiccant replacement procedure. This will keep the internal optics warm and gives added protection against humidity.
- (Optional) Purge the interferometer case by connecting the purge gas source to the quick-release fitting on the back of the interferometer case. A slow flow of ~5 scfh is appropriate.
- Remove the desiccator module from the side of the interferometer case by unscrewing it counterclockwise (see Figs. 1, 2). Use a flat head screwdriver to loosen it, if necessary.
- Temporarily seal the circular opening on the interferometer case with tape or plastic.
- Unscrew the metal cover of the porous polyethylene desiccator tube and remove the old desiccant (see Fig. 3). The old desiccant may be regenerated or discarded.
- Refill the tube with fresh desiccant and replace the cover.
- Re-install the desiccator assembly. Ensure that the o-ring is in its groove when mating the flange.
- If the purge is being used, continue purging for 15 minutes at ~5 scfh, then disconnect the purge line.
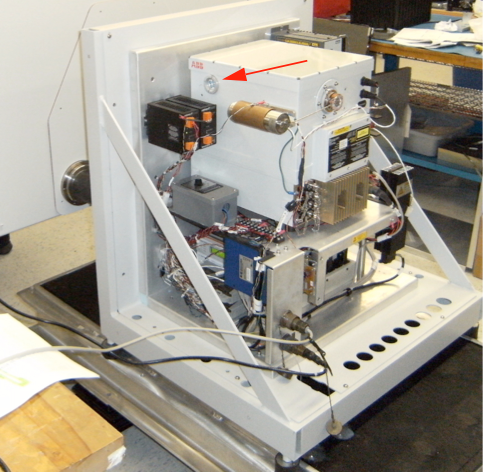
Figure 1. Desiccator module location

Figure 2. Desiccator module removal / insertion
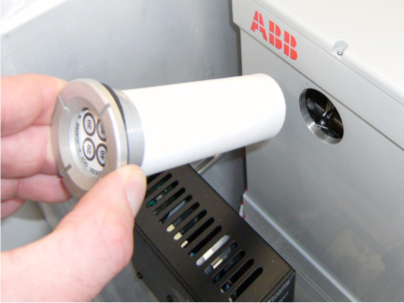
Figure 3. Desiccant inside desiccator module