First page Back Continue Last page Overview

VISITview tutorial

June, 2002

Getting your images into the lesson

VISITview lessons consist of pages. Each page may have one or more frames. Each frame is an image file (GIF, JPEG, PNG...). You may get these image files from any source (screen dumps, PowerPoint, StarOffice, etc.). We recommend keeping the image size to 800x600 or smaller, because many computer and projectors do not have higher resolution than this. You can maximize the display space for your images by using "Tear-off controls" (discussed later...).

Follow these steps to start putting images into your lesson:

  1. Click on the File menu in the upper left corner of the Lesson Builder window.

  2. Select the Browse Directories item. The scene should look like this:

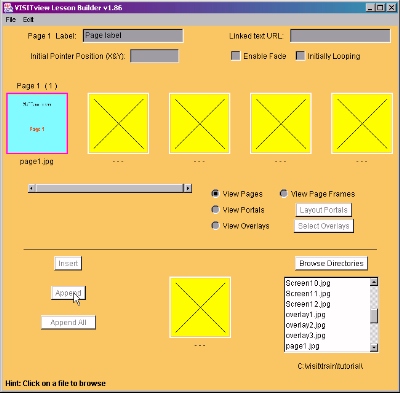
    Once you click on the Browse Directories item, a customary File Chooser Dialog box will open. Find the directory where you unpacked the tutorial images, and pick the file named Page1.jpg. The lower part of your Lesson Builder window will now look like this:

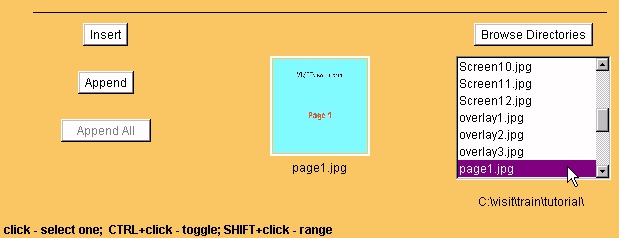
    Tip: If you ever want to see the full-sized image of one of the thumbnails, just click on the thumbnail! The full-sized image will pop up. To dismiss the full-sized image, just click on it and resume what you were doing.

  3. Now, click the Append button and the thumbnail will appear in the top panel, as shown here:

  4. Don't forget to click on the text input box next to the Page 1 Label:, and type in a new label for this page. This page label will appear in the lesson and provide you or the students with a way to quickly identify the content or subject matter of this page. For example:

  5. If you would like to have a link to a web page available to the students (using the "Show URL" button), you may type the entire URL (e.g., http://www.ssec.wisc.edu/visitview/index.html into the box to the right of the Linked text URL label.


When you're ready to create a multi-frame page for animations, click here.
To return to the VISITview Home Page, please click here.